
Starting Your Dream Blog in 2025: The Ultimate Guide
1/12/20258 min read


Starting Your Dream Blog in 2025: The Ultimate Guide
In today’s digital era, starting a blog has become an excellent way to share your thoughts, expertise, or passion with the world. Whether you aim to create a personal journal, build a professional brand, or generate income, blogging offers limitless opportunities. With the right tools and strategies, you can set up a secure and successful blog in no time. This guide will walk you through the process of starting a blog in 2025 using Bluehost for hosting.
Why Start a Blog in 2025?
Blogging continues to be relevant in 2025 for several reasons:
Personal Branding: Build your reputation in a particular field and showcase your expertise to a global audience. Blogs act as a portfolio of your knowledge and skills, making them an excellent way to attract job opportunities or clients.
Passive Income: Blogging can be a lucrative venture with multiple income streams, such as affiliate marketing, advertising, and selling products or services. Once set up, a blog can generate revenue even while you’re sleeping.
Networking: Blogs open doors to connect with like-minded individuals, industry professionals, and potential collaborators. They serve as platforms to establish meaningful relationships and grow your professional circle.
Creativity: A blog is your canvas to express ideas, thoughts, and creativity. It’s an outlet where you can share your unique perspective and stand out in a crowded digital space.
With advancements in technology and tools, creating and maintaining a blog is easier and more affordable than ever. The combination of affordable hosting and enhanced security tools makes 2025 the perfect time to start your blogging journey.
Step 1: Define Your Niche
Before diving into the technical aspects, decide what your blog will focus on. A clear niche helps attract the right audience and establishes you as an authority in your field. Some popular niches include:
Personal finance: Help readers manage their money better with budgeting tips and investment strategies.
Travel: Share your adventures, travel guides, and tips for fellow explorers.
Food and recipes: Delight readers with mouth-watering recipes, reviews, and culinary tips.
Health and wellness: Offer guidance on fitness, mental health, or holistic well-being.
Technology: Review gadgets, provide tutorials, or analyze tech trends.
Fashion and beauty: Inspire readers with the latest trends, product reviews, and styling advice.
Ask yourself:
What am I passionate about?
What am I knowledgeable about?
Is there an audience for this topic?
Once you’ve chosen your niche, brainstorm content ideas to ensure a steady flow of posts. Research popular keywords and topics in your niche to identify what readers are looking for.
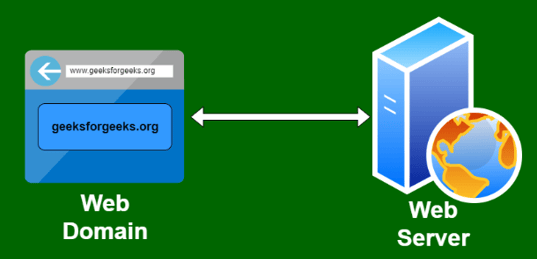
Step 2: Choose a Domain Name and Hosting Provider
Your domain name is your blog’s address on the internet (e.g., www.yourblogname.com). Choose a name that is memorable, relevant to your niche, and easy to spell. A strong domain name not only reflects your brand but also makes it easier for readers to find and remember your blog.
Using Bluehost for Hosting
Bluehost is one of the most popular hosting providers, known for its affordability, reliability, and user-friendly interface. Here’s how to get started:
Visit the Bluehost Website: Go to Bluehost and click on the “Get Started” button. The website layout is intuitive, guiding you step by step through the setup process.
Choose a Hosting Plan: Bluehost offers several plans tailored to different needs. For beginners, the Basic plan is sufficient, providing ample resources for a new blog. As your blog grows, you can seamlessly upgrade to higher-tier plans with additional features and storage.
Register Your Domain Name: Bluehost simplifies the domain registration process. You can search for your desired domain name and register it for free for the first year as part of their hosting packages.
Set Up Your Account: Provide your details and payment information to complete the purchase. Bluehost offers a transparent pricing structure, ensuring there are no hidden fees.
Install WordPress: Bluehost simplifies the process by offering a one-click WordPress installation. Within minutes, your WordPress site will be ready for customization.
Step 3: Set Up WordPress
WordPress is the most widely used blogging platform due to its flexibility and extensive range of plugins and themes. Once WordPress is installed, follow these steps:
Log In: Access your WordPress dashboard by visiting www.yourblogname.com/wp-admin. This dashboard is your central hub for managing all aspects of your blog.
Choose a Theme: Go to “Appearance > Themes” and select a theme that aligns with your blog’s niche. Free themes are an excellent starting point, but premium themes often offer enhanced design options and better support.
Install Essential Plugins: Plugins enhance your blog’s functionality and provide added features. Recommended plugins include:
Yoast SEO: Optimize your content for search engines and improve visibility.
Akismet: Protect your blog from spam comments to maintain a professional appearance.
Jetpack: Improve site performance, enhance security, and monitor your site’s analytics.
Elementor: A drag-and-drop page builder that simplifies creating custom designs without coding.
Customize Your Blog: Update your site’s title, tagline, and logo by navigating to “Settings > General” and “Appearance > Customize.” Take the time to personalize your blog’s color scheme, fonts, and layout to reflect your brand identity.
Step 4: Secure Your Blog with Surfshark VPN
In 2024, online security is paramount. As a blogger, you handle sensitive information, such as login credentials, financial data, and user details. A VPN (Virtual Private Network) adds an extra layer of security by encrypting your internet connection. Cybersecurity should never be overlooked, especially when your blog becomes a valuable asset.
Why Use Surfshark VPN?
Surfshark is an excellent choice for bloggers due to its affordability, ease of use, and robust features:
Data Encryption: Surfshark ensures that your internet traffic is encrypted, making it impossible for hackers or third parties to intercept your data. This is especially important when accessing your blog from public Wi-Fi networks.
Bypass Geo-Restrictions: Some tools, websites, or platforms might be restricted in certain regions. Surfshark allows you to bypass these restrictions by connecting to servers in different countries.
Multi-Device Support: Protect all your devices, including laptops, smartphones, and tablets, with a single subscription.
Kill Switch: Ensures your data remains private even if the VPN connection drops unexpectedly.
How to Set Up Surfshark VPN
Visit the Surfshark Website: Go to Surfshark and choose a plan that fits your budget. Surfshark often offers discounts, making it a cost-effective option for bloggers.
Download the App: Install the Surfshark app on your preferred devices. It supports various platforms, including Windows, macOS, iOS, and Android.
Log In: Use your credentials to log in. The interface is intuitive, even for beginners.
Connect to a Server: Select a server location and click “Connect.” Choose servers close to your target audience for optimal speed.
Enable Kill Switch: For added security, enable the Kill Switch feature in the app settings. This ensures that your data is never exposed, even if your VPN connection is interrupted.
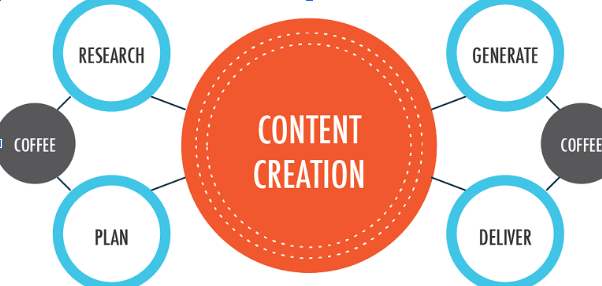
Step 5: Create High-Quality Content
Content is the heart of your blog. To attract and retain readers, focus on quality and consistency. Follow these tips:
Write Engaging Headlines: Use attention-grabbing headlines that encourage clicks. A headline is often the first impression, so make it count.
Be Authentic: Share your unique voice and perspective. Authenticity builds trust with your audience, encouraging them to return for more.
Optimize for SEO: Use relevant keywords, meta descriptions, and proper formatting to improve search engine visibility. SEO-friendly content increases your blog’s chances of ranking higher in search results.
Include Visuals: Enhance your posts with images, videos, or infographics. Visual content breaks up text and keeps readers engaged.
Publish Regularly: Develop a content calendar to maintain consistency. Regular updates signal to readers and search engines that your blog is active.
Step 6: Promote Your Blog
To grow your audience, invest time in promoting your blog. It’s not enough to create great content—you must ensure it reaches the right audience:
Social Media: Share your posts on platforms like Instagram, Twitter, Facebook, and LinkedIn. Tailor your approach to each platform to maximize engagement.
Email Marketing: Build an email list and send regular newsletters to update subscribers about new posts or special offers.
Guest Blogging: Write posts for other blogs in your niche to attract their audience. Include backlinks to your blog to drive traffic.
Networking: Engage with other bloggers by commenting on their posts and joining blogging communities. Collaborations can open doors to new opportunities.
Step 7: Monetize Your Blog
Once your blog gains traction, explore ways to monetize it. Blogging offers numerous revenue streams:
Affiliate Marketing: Promote products and earn commissions for each sale through your referral link. Choose products that align with your niche for authenticity.
Display Ads: Use platforms like Google AdSense to display ads on your blog. This passive income stream grows as your traffic increases.
Sponsored Posts: Partner with brands for paid collaborations. Sponsored content is a lucrative option once your blog establishes authority.
Sell Digital Products: Offer e-books, courses, or templates to your audience. These products leverage your expertise while providing value to readers.
Memberships: Create premium content for subscribers, such as exclusive articles or in-depth guides.
Step 8: Maintain Your Blog
A successful blog requires regular maintenance. Here’s how to keep it running smoothly:
Update Plugins and Themes: Regular updates improve functionality and security. Outdated plugins can become security vulnerabilities.
Backup Your Site: Use plugins like UpdraftPlus to back up your blog regularly. Backups ensure you can restore your site quickly in case of issues.
Monitor Analytics: Track your blog’s performance using tools like Google Analytics. Insights help you understand what’s working and where improvements are needed.
Engage with Readers: Respond to comments and emails to build a loyal community. Reader interaction fosters a sense of connection and trust.
Final Words
Starting a blog in 2024 is an exciting journey that can be both rewarding and fulfilling. By using Bluehost for hosting and Surfshark VPN for security, you can create a professional and secure blogging platform. With dedication and consistency, your blog can grow into a valuable asset that reaches and impacts a global audience.
Take the first step today and turn your blogging dream into reality.


About KamiFlux
Welcome to KamiFlux, your ultimate guide to making money online and building a successful digital business. Whether you're just starting out or looking to scale your income, we provide practical tips, tools, and resources to help you achieve your goals. Our mission is to empower you with the knowledge and strategies needed to turn your ideas into a profitable reality. Join us on the journey to financial freedom and take the first step toward building the life you deserve!